|
|
|
|
#1 |
|
Участник
|
stoneridgesoftware: 5 Easy Steps to Create Your Own Calendar View in D365 Customer Engagement
Источник: https://stoneridgesoftware.com/5-eas...mer-engagement
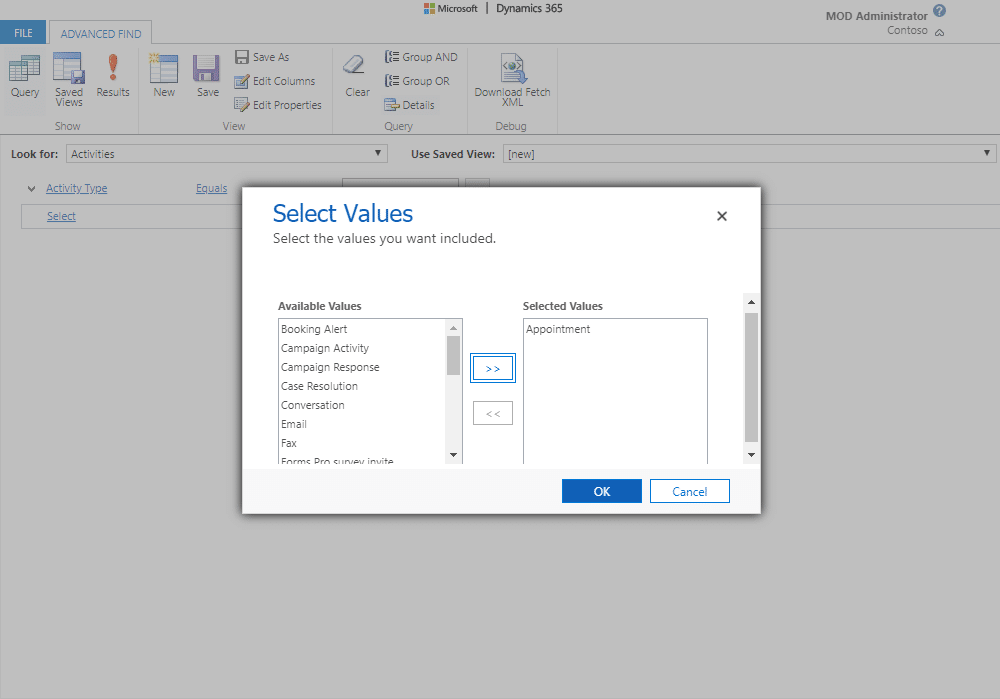
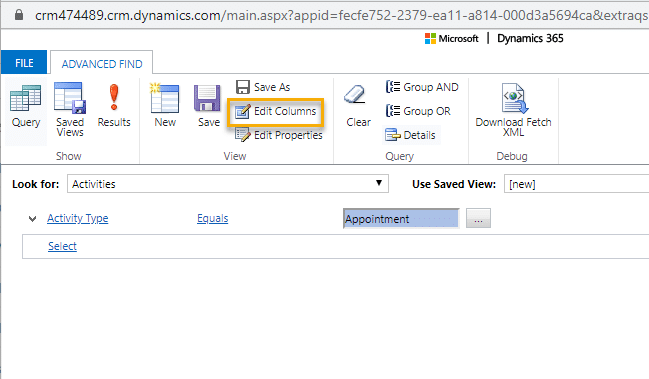
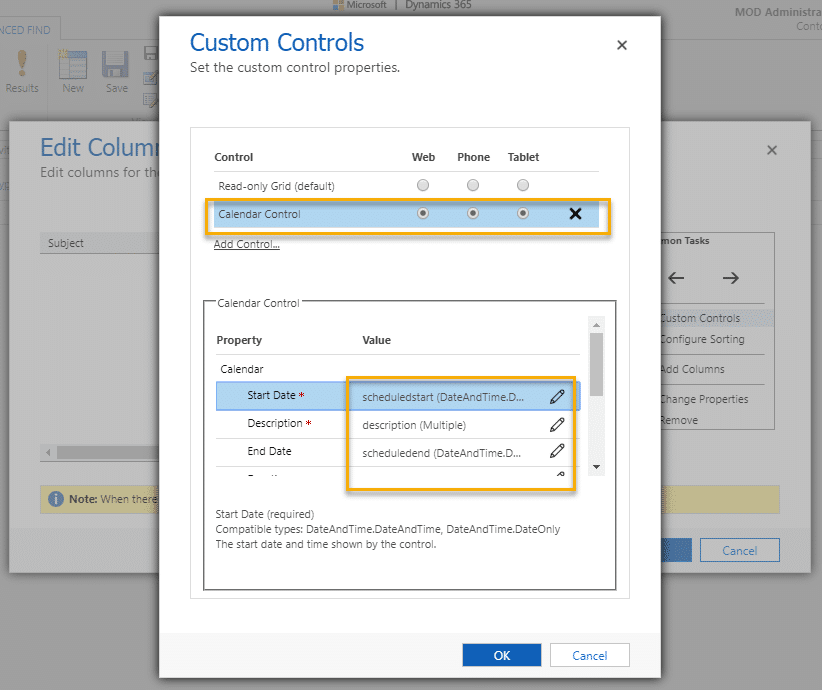
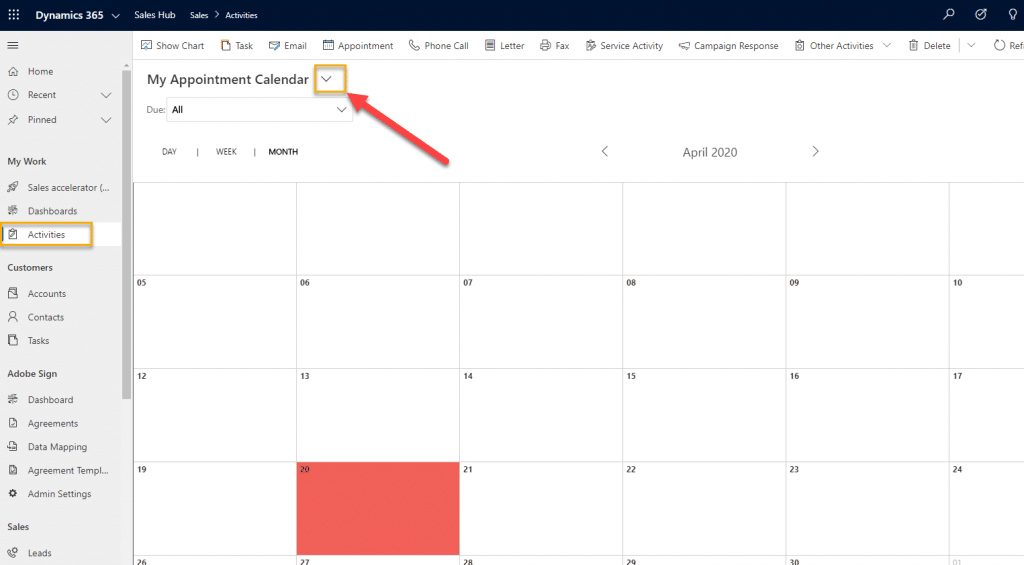
============== Would you prefer to see your tasks or appointments in a calendar view instead of the out-of-the-box grid view? I’ll show you how to quickly accomplish creating your own calendar view in D365 Customer Engagement in just a few steps. These five steps will allow you to create a personal view, not a system view. So this will only be visible to you. Step 1 Let’s create a calendar view for appointments. Click on the Advanced Find button (funnel icon) in the top right of your screen Step 2 In the ‘Look for’ dropdown, select Activities. Then click the ‘Select’ dropdown below and choose Activity Type. A new window will pop-up. Select Appointment from the available values.  Step 3 Now click Edit Columns in the command bar  Step 4 The Edit Columns window will now pop-up. Select Custom Controls on the right. Once the Custom Controls window opens, click Add Control and choose Calendar Control. Now choose if you want this control viewable on Web, Phone, and/or Tablet. Click the pencil icon below to select your fields for Start Date, Description, End Date, etc. and then click OK.  Step 5 Click OK again to close the Edit Columns window. Now you need to save your view. Click Save As on the ribbon and give your new view a name. That’s it, you’re done! You can close out of the Advanced Find.  Refresh your browser, and then go to your Activities entity. Your new view will be available there!  Thanks for checking out this blog, I hope it helped you set up your first calendar view in Customer Engagement. Be sure to subscribe and check out our other blogs for more helpful tips and tricks! Источник: https://stoneridgesoftware.com/5-eas...mer-engagement
__________________
Расскажите о новых и интересных блогах по Microsoft Dynamics, напишите личное сообщение администратору. |
|
|
|
|
|