
|
|
#1 |
|
Участник
|
powerobjects: How to Export a Theme from One Dynamics 365 Org to Another
Источник: https://www.powerobjects.com/2017/12...rg-to-another/
==============  You may have noticed you can now create your own Themes in Dynamics 365. Of course as good admins, we do not make these changes within our PRODUCTION environment, unless we have no choice. Rather we make all of our changes within our DEVELOPMENT environment, and then export our change solution and import into our PRODUCTION environment. You may have noticed that you cannot add Themes to a solution. Well, this creates a little bit of an issue. Luckily, our friends at Microsoft have added a nifty feature to export a theme and import a theme from one org to another. One caveat is that the export of a theme is accomplished through the use of the Export to Excel functionality within Dynamics 365. As luck would have it, in the themes area of Dynamics 365 we have an Export to Excel button (see figure 1.0). Figure 1.0  Clicking that button only exports the field values that are shown in the Themes view. Which as you can see in the above image are only the Theme Name, Type, and Default theme. Unfortunately, this view does not contain the fields that hold that data we need…darn. BUT have no fear, because we are here to show you the way to overcoming this obstacle…to the D365 Cave! The first thing we need to do is to create a view that will provide us with the data fields that the theme uses to produce all these cool colors. 1. Click the View selector and select Create Personal View.  Next, we need to add the Columns that hold the data for the Theme. To do this complete the following. 2. Click on Edit Columns
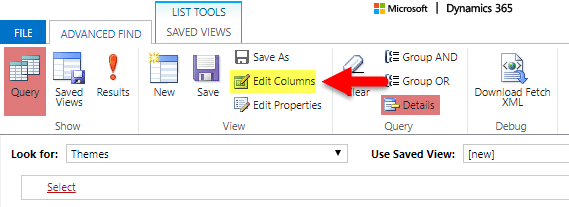 3. Click Add Columns
 4. Select the following Columns; then click OK.
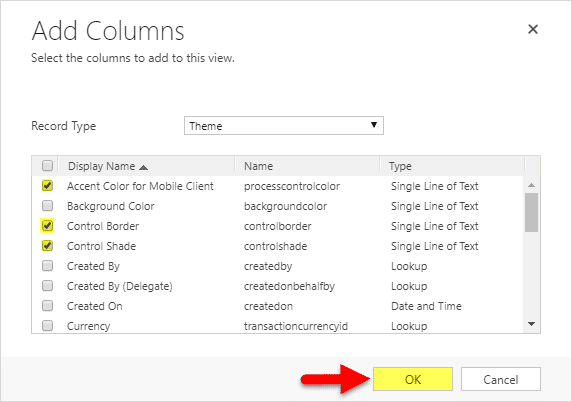 I would suggest putting the columns into this order, left to right, as this is how they read from the Theme input screen.
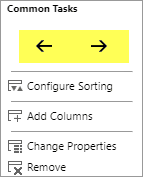 Once you are finished with moving the columns; click OK. One additional thing you can do is to filter your theme view to only include custom themes 5. Click on Select.
 6. Select Type. 7. Select Equals. 8. Click on the … button and select Custom; click OK. 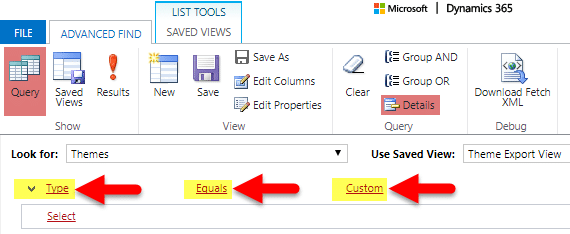 Now our view will only display the themes that are custom. I would suggest saving your view at this time in case you ever need to export a theme again. 9. Click Save As in the Ribbon
  Now we have a view that will contain all of the data our theme requires to be exported and imported. If you click the view selector again we now see our new view. Select our new view. 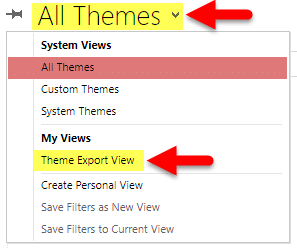 You will see that our View has all of the columns required by the Theme.  Next, we need to Export our Theme. 10. Click the Export to Excel button on the ribbon.
 Next, we need to go to our PRODUCTION environment and import our theme. 11. Click the Import Data button in the ribbon
 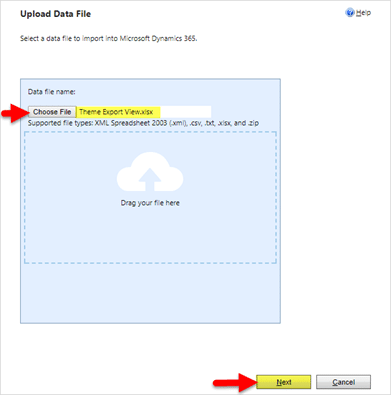 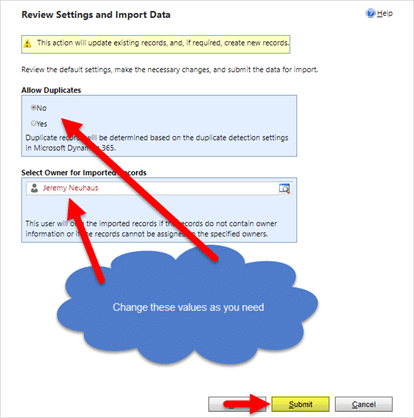 All that is left is to Publish your new theme. 12. Select your Theme; then click publish on the ribbon.  There you have it! Now you know how to export a theme and import a theme from one org to another – yay! For more helpful tips and tricks for Dynamics 365, be sure to check out our blog and subscribe. Happy Dynamics 365’ing! Источник: https://www.powerobjects.com/2017/12...rg-to-another/
__________________
Расскажите о новых и интересных блогах по Microsoft Dynamics, напишите личное сообщение администратору. |
|
|
|
|
|