 01.11.2018, 03:14
|
#1 |
|
Участник
|
yetanotherdynamicsaxblog: Upgrade from 7.x to 8.+ series | Post 3 | Validate Code and Data in Dev
Источник: http://yetanotherdynamicsaxblog.blog...es-post-3.html
============== Introduction In these series of posts. I will try to run you through the process of how you can complete the upgrade from 7.x to 8.+ of Dynamics 365 for Finance and Operations. Quick navigation: Upgrade from 7.x to 8.+ series | Post 1 | Start in LCS Upgrade from 7.x to 8.+ series | Post 2 | Deploy Dev and Grab source DB Upgrade from 7.x to 8.+ series | Post 3 | Validate Code and Data in Dev (you are here) Upgrade from 7.x to 8.+ series | Post 4 | Setup a new Build Upgrade from 7.x to 8.+ series | Post 4 | Upgrade Sandbox and finally Production Connect to code Given the code upgrade is completed in LCS, a process that shouldn't take many hours, and the Development VM is published, you can connect the local PackageLocalDirectory to the branch folder holding the "release". Open Visual Studio, Connect to the Azure DevOps (VSTS) account and the right project, and then map your workspace to the "release". Notice I point the Metadata folder under the release to my local PackageLocalDirectory.  Let's have a quick look at the result from the Code Upgrade process. Like I wrote in the first post, the upgrade removes Microsoft hotfixes, but keeps any other custom packages and modules. Put another way, the code upgrade will first copy your source metadata, then remove Microsofts modules, and it will sort of look a little bit like this. 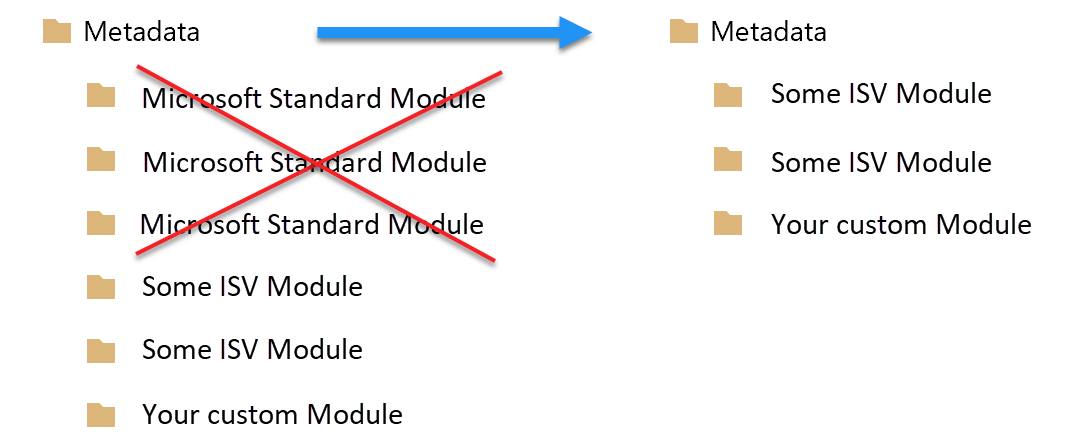 If you were to take one of your existing development VMs and connect to the "release" branch folder and run a "Get Latest", the exact same steps would happen on your machine; you would see all the Microsoft Standard Module files be deleted under your PackageLocalDirectory. DON'T DO IT! You may wonder why that doesn't happen on the new development VM. Well, since the Workspace you have just created on the new VM was created after the cleanup of the upgraded branch, nothing gets deleted locally when you run "Get Latest" on the new "release" branch folder. So next you basically will have to make sure your application builds and works as expected - before you can continue. Upgrade the Data When you application is 8.+, you can go ahead and get the 7.x database and upgrade it on this development environment. This process should reveal any possible technical issues of sorts. Let's first download the database to the VM from the cloud storage mentioned on post 2. You can either use Microsoft Azure Explorer or use the community driven PowerShell library d365fo.tools, like this. Import-Module d365fo.tools $dbsettings = Get-D365DatabaseAccess $params = @{ AccountID = 'STORAGE_ACCOUNT_NAME' AccessToken = 'LONG_AND_SECRET_ACCESS_KEY_FOUND_ON_THE_STORAGE_ACCOUNT_IN_THE_AZURE_PORTAL' Blobname = 'NAME_OF_THE_BLOB' Path = 'D:\Backup\' FileName = 'D:\Backup\sandbox_adhoc.bacpac' } Invoke-D365AzureStorageDownload @params With the database extract (bacpac), you will have to import it, overwriting the existing AxDB. There are a few gotchas when doing this, and you can either do it manually, following the guide on docs, or you can again use the PowerShell library d365.tools to help you out: Import-Module d365fo.tools $bacpacFile = 'D:\Backup\sandbox_adhoc.bacpac' $sourceDatabaseName = "AxDB_Source_$(Get-Date -UFormat "%y%m%d%H%M")" #Remove any old temp source DB Remove-D365Database -DatabaseName $sourceDatabaseName -Verbose #Stop local environment components Stop-D365Environment -All # Import the bacpac to local SQL Server Import-D365Bacpac -ImportModeTier1 -BacpacFile $bacpacFile -NewDatabaseName $sourceDatabaseName -Verbose #Remove any old AxDB backup (if exists) Remove-D365Database -DatabaseName 'AxDB_original' -Verbose #Switch AxDB with source DB Switch-D365ActiveDatabase -DatabaseName 'AxDB' -NewDatabaseName $sourceDatabaseName -Verbose Start-D365Environment -All The script above does several things, like importing the bacpac and replacing the existing AxDB with the imported database. The whole process may take quite some time, because the bacpac import is a slow process. Also, the actual mdf and ldf file for the AxDB will have a date and timestamp, making it unique for each time you import - if you need to do it more than once. When the database is imported, you will need to head back to LCS and apply the Software Deployable Package created by Microsoft specifically for doing the DataUpgrade. This process will also take some time, but at the end of it, you will have an upgraded database. The package is named DataUpgrade-81 and if you look at its description, it is one single package that upgrades the database from any previous 7.x version to 8.1. 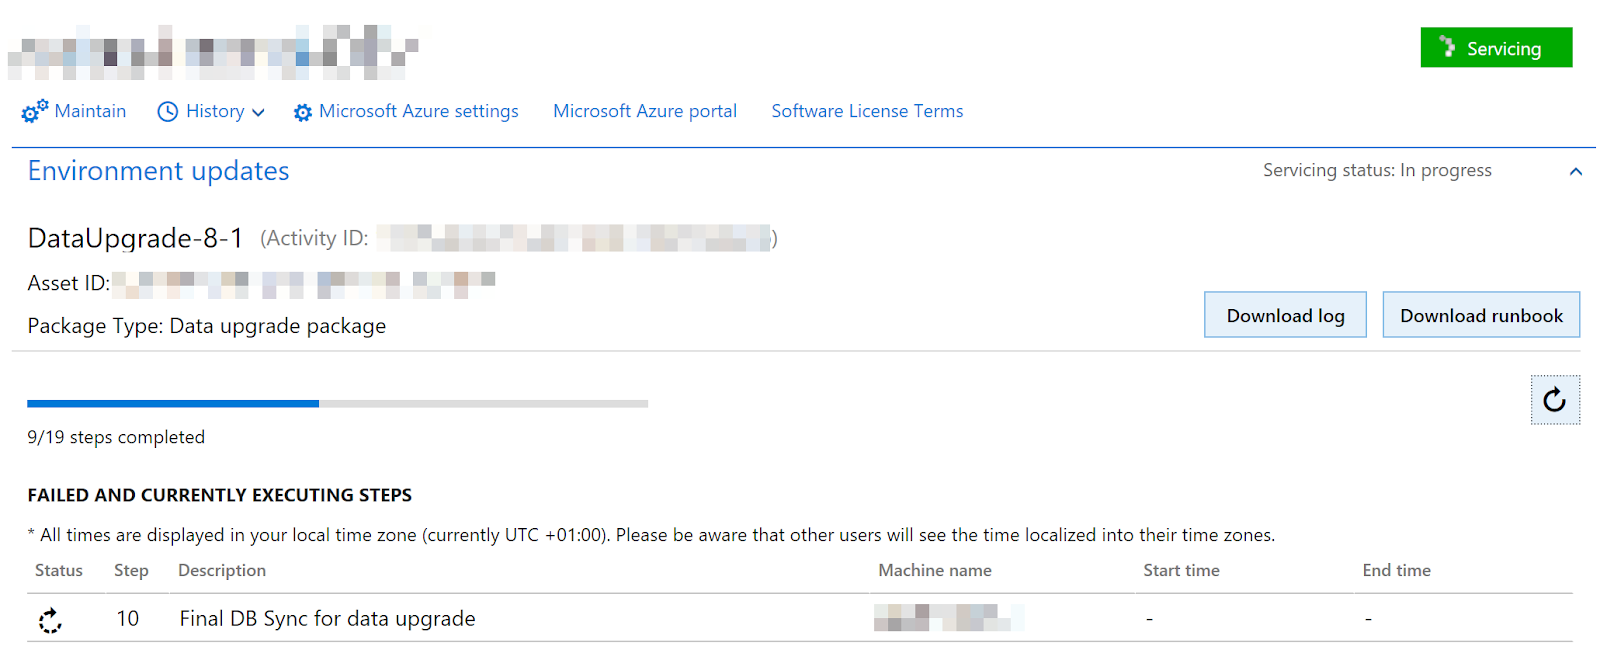 In the next post, I will show one possible way to prepare your new build for 8+, which is a necessity before you can continue with updating your Sandbox and later your Production. Источник: http://yetanotherdynamicsaxblog.blog...es-post-3.html
__________________
Расскажите о новых и интересных блогах по Microsoft Dynamics, напишите личное сообщение администратору. |
|
|
|
|
|


 Древовидный вид